Installing PowerShell and Visual Studio Code
*If you're just joining us, this post is part of a 12-part series on Getting Started with PowerShell. If you'd like to catch up (or skip ahead - more posts coming soon), click on the appropriate post below.
Getting Started with PowerShell
Windows PowerShell, PowerShell Core and PowerShell: Huh?
To start writing some awesome PowerShell scripts, you must have it installed. In this tutorial series, you're going to learn with PowerShell (not Windows PowerShell). Unlike Windows PowerShell, which comes pre-installed with Windows, plain ol' PowerShell formerly known as PowerShell Core must be installed separately.
Since I'm assuming you're going to actually create some scripts at some point, you'll also need a great code editor. One of the most popular PowerShell editors is Visual Studio Code. To take care of all of the set up as early as possible, we're going to knock out both of these tasks in this post.
Note that you will not learn how to use the PowerShell ISE in this tutorial series. Even though the PowerShell ISE works find for newcomers, you shouldn't get used to it. Visual Studio Code is the new focus and all new development is focused on it as Microsoft's preferred editor.
By the time you've completed the walkthrough in this post, you'll have PowerShell and Visual Studio Code installed with some basic configuration to hit the ground running.
Before you Start
To ensure your environment is as close to the demo environment as possible, please be sure you meet the following prerequisites before starting.
Windows 10 - Any build of Windows 10 released in 2019 or 2020 will work. There are no major dependencies here. The demo environment will use Windows 10 build 1903.
Local administrator permissions - You'll need to be logged in with local administrator permissions or equivalent to install software.
Tutorial Overview
In this tutorial, you're going to install both PowerShell and Visual Studio Code. You will:
Install the PowerShell v6.2.4 package from GitHub manually via MSI on Windows 10. The steps we are covering should be the same or similar for other versions.
Perform some minor tweaks to the PowerShell console
Install Visual Studio Code v1.4.2 on Windows 10. The steps we are covering should be the same or similar for other versions.
Install the Visual Studio Code PowerShell extension via EXE installer
Perform some minor setup configuration changes to Visual Studio Code
Installing PowerShell
First up, let's get PowerShell installed! To do that, head over to the PowerShell GitHub releases page. PowerShell development and releases are all stored in GitHub. At the time of this writing, PowerShell 6.2.4 is the latest version available. Scroll down a little bit and you'll see download links for many different platforms.
Click on PowerShell-x.x.x-win-x64.msi to download it.
Once downloaded, run the installer.
Click Next through the first couple of prompts until you come to the Optional Actions screen. By default, you'll see two actions checked - Add PowerShell to Path Environment Variable and Register Windows Event Logging Manifest.
Add PowerShell to Path Environment Variable - This open adds the PowerShell installation folder to Windows' PATH environment variable. This allows you to run PowerShell while in any directory from the command prompt.
Register Windows Event Logging Manifest - This option allows PowerShell Remoting to work as well as enabling various advanced logging techniques.
At this time, you can keep the default selections and click on Next and Install.
When installation is complete, you should see a screen to Finish the installation and a checkbox to Launch PowerShell immediately. To save time, check the Launch PowerShell checkbox and click on Finish.
The PowerShell console should soon launch shortly after clicking Finish to a black background as shown below. If so, you're done! That's all there is to installing PowerShell on Windows.
Tweaking the PowerShell Console
The PowerShell console, like the old school command prompt allows you to change up many different settings. The settings to change depend highly on your preferences but there are some common settings many users tend to change right away.
All screenshots in this tutorial series will be using the default PowerShell settings. If you decide to change any default settings in the console, please be aware your console may look and behave differently.
To view current (and change) PowerShell console settings, click on the PowerShell icon in the upper left corner and click on Properties as shown below.
In the Properties window, you will see lots of options. We can't possibly cover all settings in this tutorial but we'll skim a few popular ones.
One common setting to change is the font size. If you click on the Font tab, you'll see many options to change up the font. Here you can change up the size which some people feel is too small. If you change the size and click on OK, you will see the font size increase immediately.
The Colors tab is another popular tab here for people that prefer a different color for text or the background. Feel free to play around with the font, colors and other options to get a look and feel that's uniquely yours.
Installing Visual Studio Code (VS Code)
You've got PowerShell up and ready to go. Now it's time to install VS Code. Although you won't be using VS Code for awhile in this series, we might as well be prepared and ready to go later on!
To install VS code, you'll first need to download it from the VS Code download page. Since you're installing the application on Windows, choose Windows as shown below.
Once the EXE is done downloading, run it and click through the defaults. There is no special configuration you need to do during the install stage.
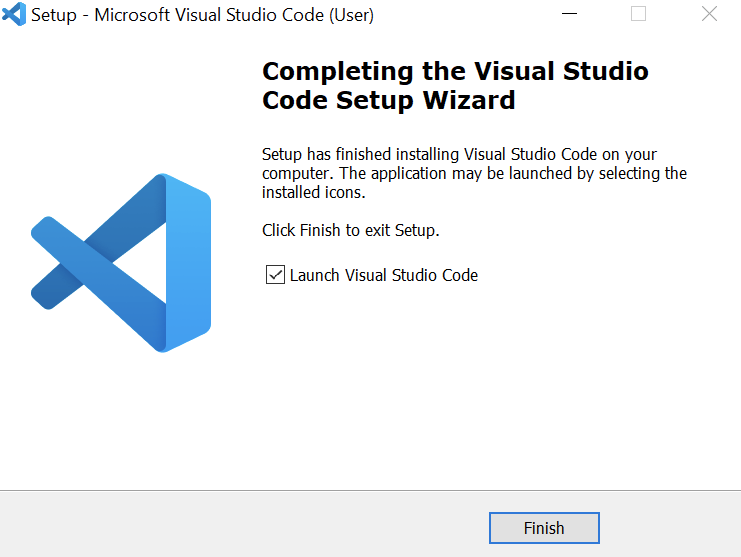
When complete, click on Finish as shown below. Since Launch Visual Studio Code is selected, it should then immediately launch the application
Installing the VS Code PowerShell Extension
Even though you'll be using VS Code for PowerShell development, PowerShell isn't the only language it supports. VS Code can be thought of as a platform for code development. It has a large assortment of extensions you can add to make it adapt to your language of choice.
For this tutorial, you'll be installing the PowerShell extension. The PowerShell extension adds a ton of functionality like syntax highlighting, easy code navigation and a ton more. But, no need to overwhelm you at this point. Suffice it to say, VS Code is the way to write your PowerShell scripts.
With that being said, let's see what it takes to install the PowerShell extension.
In this tutorial, the examples will use PowerShell extension v2020..1.0. The installation and initial setup will probably be similar but not guaranteed with other versions.
While in VS Code, click on the icon on the left that looks like four blocks as shown below. This will open the Extensions marketplace. The extensions marketplace is an online repository of thousands of extensions both Microsoft and the community has built for various purposes.
When the extension shows up, click on the green Install button.
Once in the Extensions marketplace, type 'powershell' to search for the PowerShell extension. If all goes well, you should then see the PowerShell extension show up as the first result at the top. Below you can see the PowerShell extension v2020.1.0 as the first result.
The extension should only take a few seconds to install. When it does, the color theme of VS Code will change (as of v2020.1.0). The colors change to match the colors of the legacy PowerShell ISE script editor. You are free to accept this color theme or modify your own at some point.
For this tutorial, we'll keep the default PowerShell ISE theme and hit Enter to select PowerShell ISE from the color theme selection as shown below.
If you'd rather have a different color theme, be sure to check out all of the available themes from the marketplace.
At this point, you're ready to start learning PowerShell!
Summary
In this tutorial, you performed a few basic setup tasks to get started writing PowerShell scripts. You installed the PowerShell engine to run PowerShell scripts and install VS Code to begin writing some time-saving scripts.
Stay tuned for the next blog post in our series where you will learn how to discover and run your first PowerShell commands and how to find help when you need it.


